More and more consumers are using Google to find businesses near them. If you run a brick-and-mortar store or if you sell your products to retailers, having a Google Map on your WordPress website is a great way to get potential customers to visit your physical store(s), thus generating more business for you. But how exactly can you add a Google Map to WordPress?
In this article, you will learn how you can add a Google Map to your WordPress site, why it’s worth doing, and how you can do it even more effectively with Storemapper.
Table of Contents
- 3 Ways to Add a Google Map to WordPress
- Use a store locator app
- Install a WordPress plugin
- Embed your map without a WordPress plugin
- Why you should add a Google Map to WordPress
- How to Add a Google Map to Your WordPress Site with Storemapper
- Add a Google Map to WordPress FAQs
Increase your WordPress store's visibility with Storemapper
Start your free, no-risk, 7-day trial today
No credit card required
3 Ways to Add a Google Map to WordPress
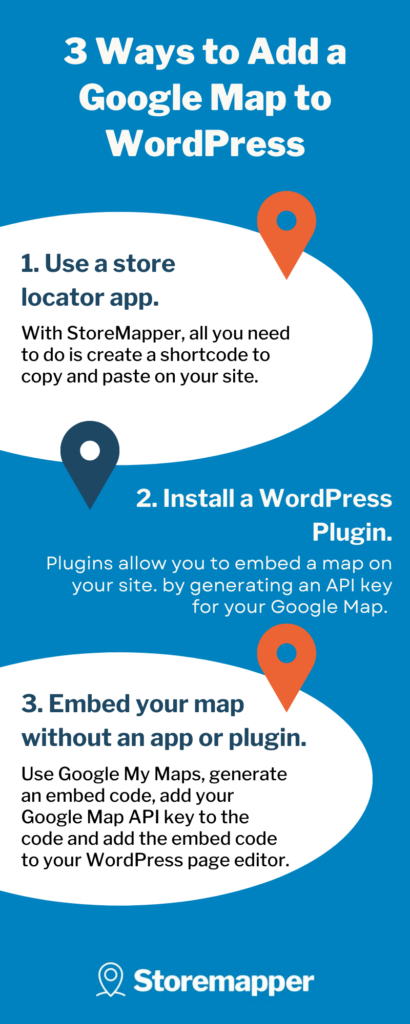
You can add Google Maps to your website in a variety of ways. Let’s take a look at the top three options available:
Option 1: Use a WordPress Store Locator App
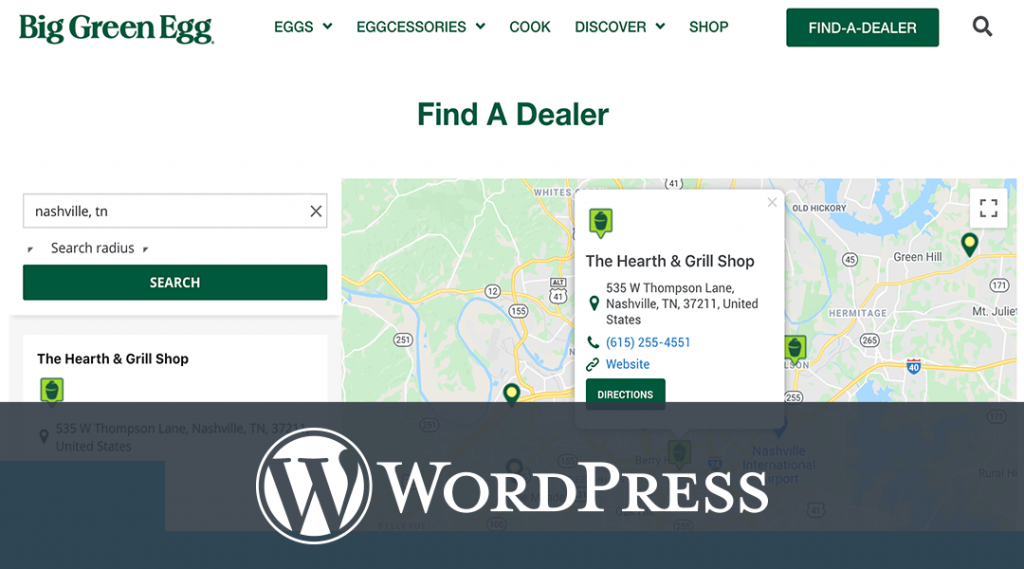
A WordPress store locator app is a widget that displays a map on your site (or mobile app) so that visitors can see where your physical store is located. WordPress store locators use Google Maps (as well as other map APIs) and come with many features like location information, directions, customizable map themes and markers, and more.
A quick search on the internet will pull up a variety of store locator apps. Many brands, like Over Under Clothing, choose Storemapper over the rest for several reasons:
- It’s easy to install and use
- It lets you add and edit stores
- It doesn’t require any coding knowledge
- It comes with an analytics tool that lets you monitor store performance
- It allows you to freely customize how it looks to fit your site’s design
- It has a responsive support team that can help you with anything you need
To embed your map, you must create a shortcode to copy and paste onto your site. We’ll go over that in more detail in a bit.
Option 2: Install a WordPress plugin
Plugins are a staple for websites made with WordPress. They allow you to add different features to your website without developing them from scratch.
You can install many WordPress store locator plugins to embed a map on your site. Any plugin you come across will most likely provide instructions on installing and using it. Generally, it goes like this:
- Install and activate the WordPress plugin.
- Generate an API key for your Google Map (Not sure how? Check this page).
- From your WordPress dashboard, create a map.
- Attach your API key to that map.
- Customize your map and add your business location information.
- The plugin creates a shortcode you can embed on any page or post.
WordPress plugins look good and aren’t difficult to set up for the most part. Storemapper also offers a native WordPress plugin to add your map to your site directly from there easily. Here’s how:
Option 3: Embed your map without a WordPress plugin
To add a Google Map to your site without using a WordPress plugin, you can use Google My Maps, the official Google map creator.
Here are the steps you have to follow to:
- Go to Google My Maps and create a map
- Make your map public
- Generate an embed code for your map
- Add your Google Map API key to the embed code
- Add the embed code to the Text tab on your WordPress page editor
- Preview the map and save your page
This method works well for displaying a basic Google Map on your site. But if you want additional features like driving distance and directions or an unlimited number of locations, then WordPress plugins like Storemapper offer more possibilities.
You can use any of these three options to add a Google Map that accurately displays the location of your business. That said, a WordPress store locator app like Storemapper will let you freely customize your map to match the branding and request the assistance of a dedicated support team whenever needed, all while being affordable.
Why You Should Add a Google Map to WordPress
You might wonder whether adding a Google Map to your site can make a difference in your business. The answer is yes, it definitely can. Here’s why:
Reason #1: It helps customers find your products
Consumers use Google Search more than ever to find the products they want. According to Google, searches for “local” + “business(es)” have grown by more than 80% year over year, including searches like “local businesses near me” and “support local businesses”. Searches for “open now near me” have grown globally by over 400% YOY. They often research and compare stores before going on a shopping trip.
Adding a Google Map to your WordPress site provides easy directions to your business locations and effectively meets your customers halfway as they search on Google. Google Maps is particularly handy because nearby reference points like parking lots, schools, or restaurants can easily guide your customers to your business.
On top of helping visitors find your products, adding a Google Map to your WordPress website provides them with plenty of useful information as well:
- Business hours
- Holiday closings
- Phone number
- Reviews
- And more
Providing this information upfront reduces the number of steps needed for a person to decide to visit your store. Plus, positive reviews go a long way to presenting your business as the best option.
Bring your store on the map and increase your store visibility with Storemapper
Start your free, no-risk, 7-day trial today
No credit card required
Reason #2: It increases your store’s foot traffic
When you make it easy for customers to locate the nearest store to their location, they are much more likely to visit it. And increasing foot traffic simply means more sales for your business – word of mouth will spread naturally, and shoppers may buy more than what they came for.
Storemapper uses geolocation to detect a website visitor's location and ask them if it’s okay to use it. Once they accept, Storemapper instantly determines the nearest store as it loads the map, encouraging visitors to go there.
Reason #3: It boosts your local SEO
Local SEO has become a major marketing method for brick-and-mortar businesses to gain online visibility. Having a Google Map on your site can be a practical part of your local SEO strategy.
A Google Map compels visitors to spend more time on your website since they won’t have to leave your website, open a new tab, and search for directions on Google. They will also interact with your Google Map, zooming in and out, scrolling, and planning their route. Each visitor's additional time spent on site and the reduced bounce rate add up over time and help boost your website’s visibility on Google.
Adding a WordPress store locator may seem tricky, but it’s actually very easy with Storemapper, and the upside is limitless. Let’s see how you can do it.
How to Add a Google Map to Your WordPress Site with Storemapper
There are a few ways you can use Storemapper on WordPress, but we will go over the most popular option: embed your map.
Step 1: Create a Storemapper account
The first step is to sign up for a 7-day trial if you don’t have a Storemapper account already. The trial is free, and you don’t have to enter your credit card information.
Step 2: Add your Google Map API key to your Storemapper account
To display Google Maps on your website, you need a Google Map API key – a unique piece of code provided by Google for identification and billing purposes.
So what you need to do is simply copy your API key. If you don’t have a Google Map API key yet, follow the instructions in this article to generate one.
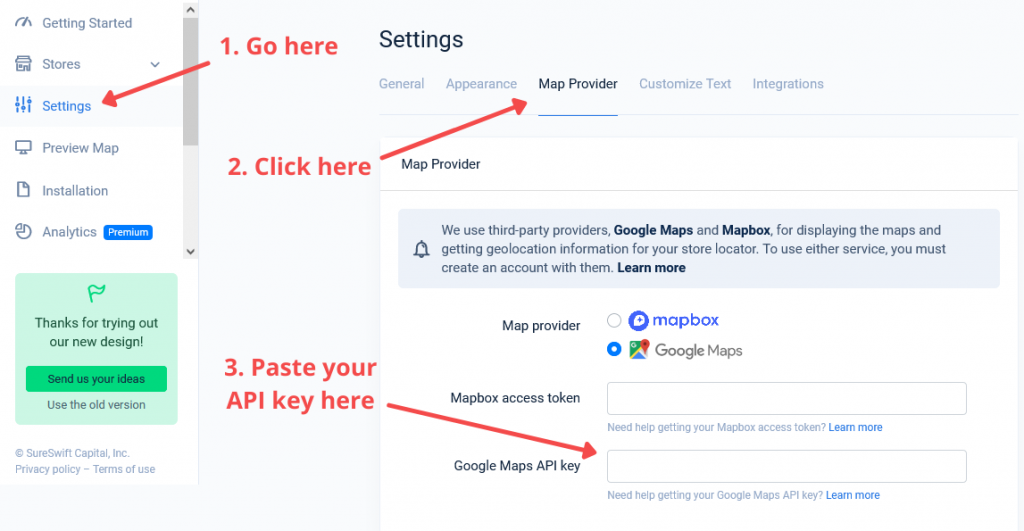
Next, you just have to log into your Storemapper account and go to ‘Settings.’ > 'Account Settings'. Click on ‘Map Provider,’ then paste your API key in the ‘Google Maps API key field and click on ‘Save Changes.’
Step 3: Get your embed code
Go to ‘Installation’ and you will find your store’s embed code – simple as that. Select and copy it or just click on ‘Copy to Clipboard’.
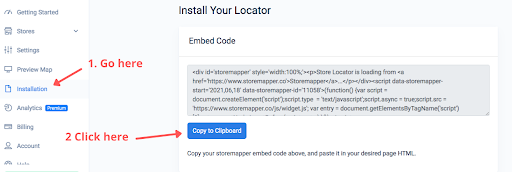
Note that you only need to embed the code once – any changes you make later will automatically be displayed on your site.
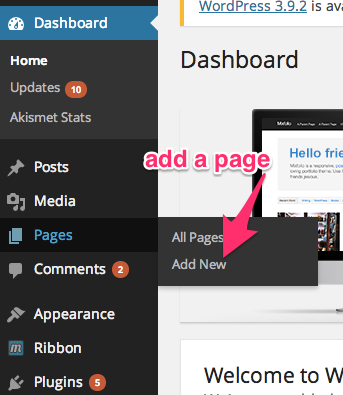
Step 4: Create a page in your WordPress site
To add a Google Map to your WordPress site with Storemapper, you can create a new page in WordPress or use an existing one, like your homepage. We recommend creating a new page for map usage optimization reasons.
Head over to your WordPress Admin and create (or choose) a page where your Google Map will be displayed.
Step 5: Copy and paste your embed code
Switch the page editor to “Text,' then paste your embed code in the field.

Step 6: Save your page and voilà!
All that’s left is to save the page, and you’re done! Your Google Map will show up on your WordPress site.
As you can see, adding a Google Map to WordPress with Storemapper is quick and straightforward. No coding skills are required – you can do this in minutes.
Frequently Asked Questions about Adding a Google Map to WordPress
Why should I add Google Maps to my WordPress site?
You can use Google Maps to add embedded maps to your site. This is a great way to help customers find your location and show them where you are located in relation to other locations. It also allows you to add extra functionality such as directions, contact information, and more.
What’s the best way to add a Google Map to a WordPress site?
The best way to add a Google Map to your WordPress website is by using a store locator app like StoreMapper. You can embed a few lines of code and get it set up in minutes.
What’s the best WordPress map plugin?
StoreMapper is a WordPress plugin that allows you to add a map to your blog easily. It's one of the easiest and most effective ways to visualize your business's location. StoreMapper can be used to add a map to any post or page in WordPress. You can also use it to customize the appearance of maps on mobile devices. This is a great way to visualize your company's location and increase visibility in your local community.
How do I embed a Google Map to WordPress?
To add a Google Map to your site without using a WordPress plugin, you can use Google My Maps, the official Google map creator. Go to Google My Maps and create a map. Then, make your map public. Next, generate an embed code for your map. Then, add your Google Map API key to the embed code. Add the embed code to the Text tab on your WordPress page editor. And finally, preview the map and save your page.
Conclusion
Do you know what’s great about Google Maps? Unlike any other map or navigation application, Google Maps can pinpoint your location within a few feet using GPS. By adding a Google Map to your website, you can bring convenience to your visitors. They will see your location on a map and be able to get directions from their location to your store. This way, you can direct more potential customers to your business and help more customers find your products.


